Robotics App
Loading a workflow
To run experiments, an ExpFlow Robotic Workflow must be downloaded as a JSON to the Robotics Workstation (Download robotic workflow) then loaded through the Robotics App. This process converts the ExpFlow Robotic Workflow to a FireWorks-based workflow and adds the workflow to the local FireWorks launchpad.
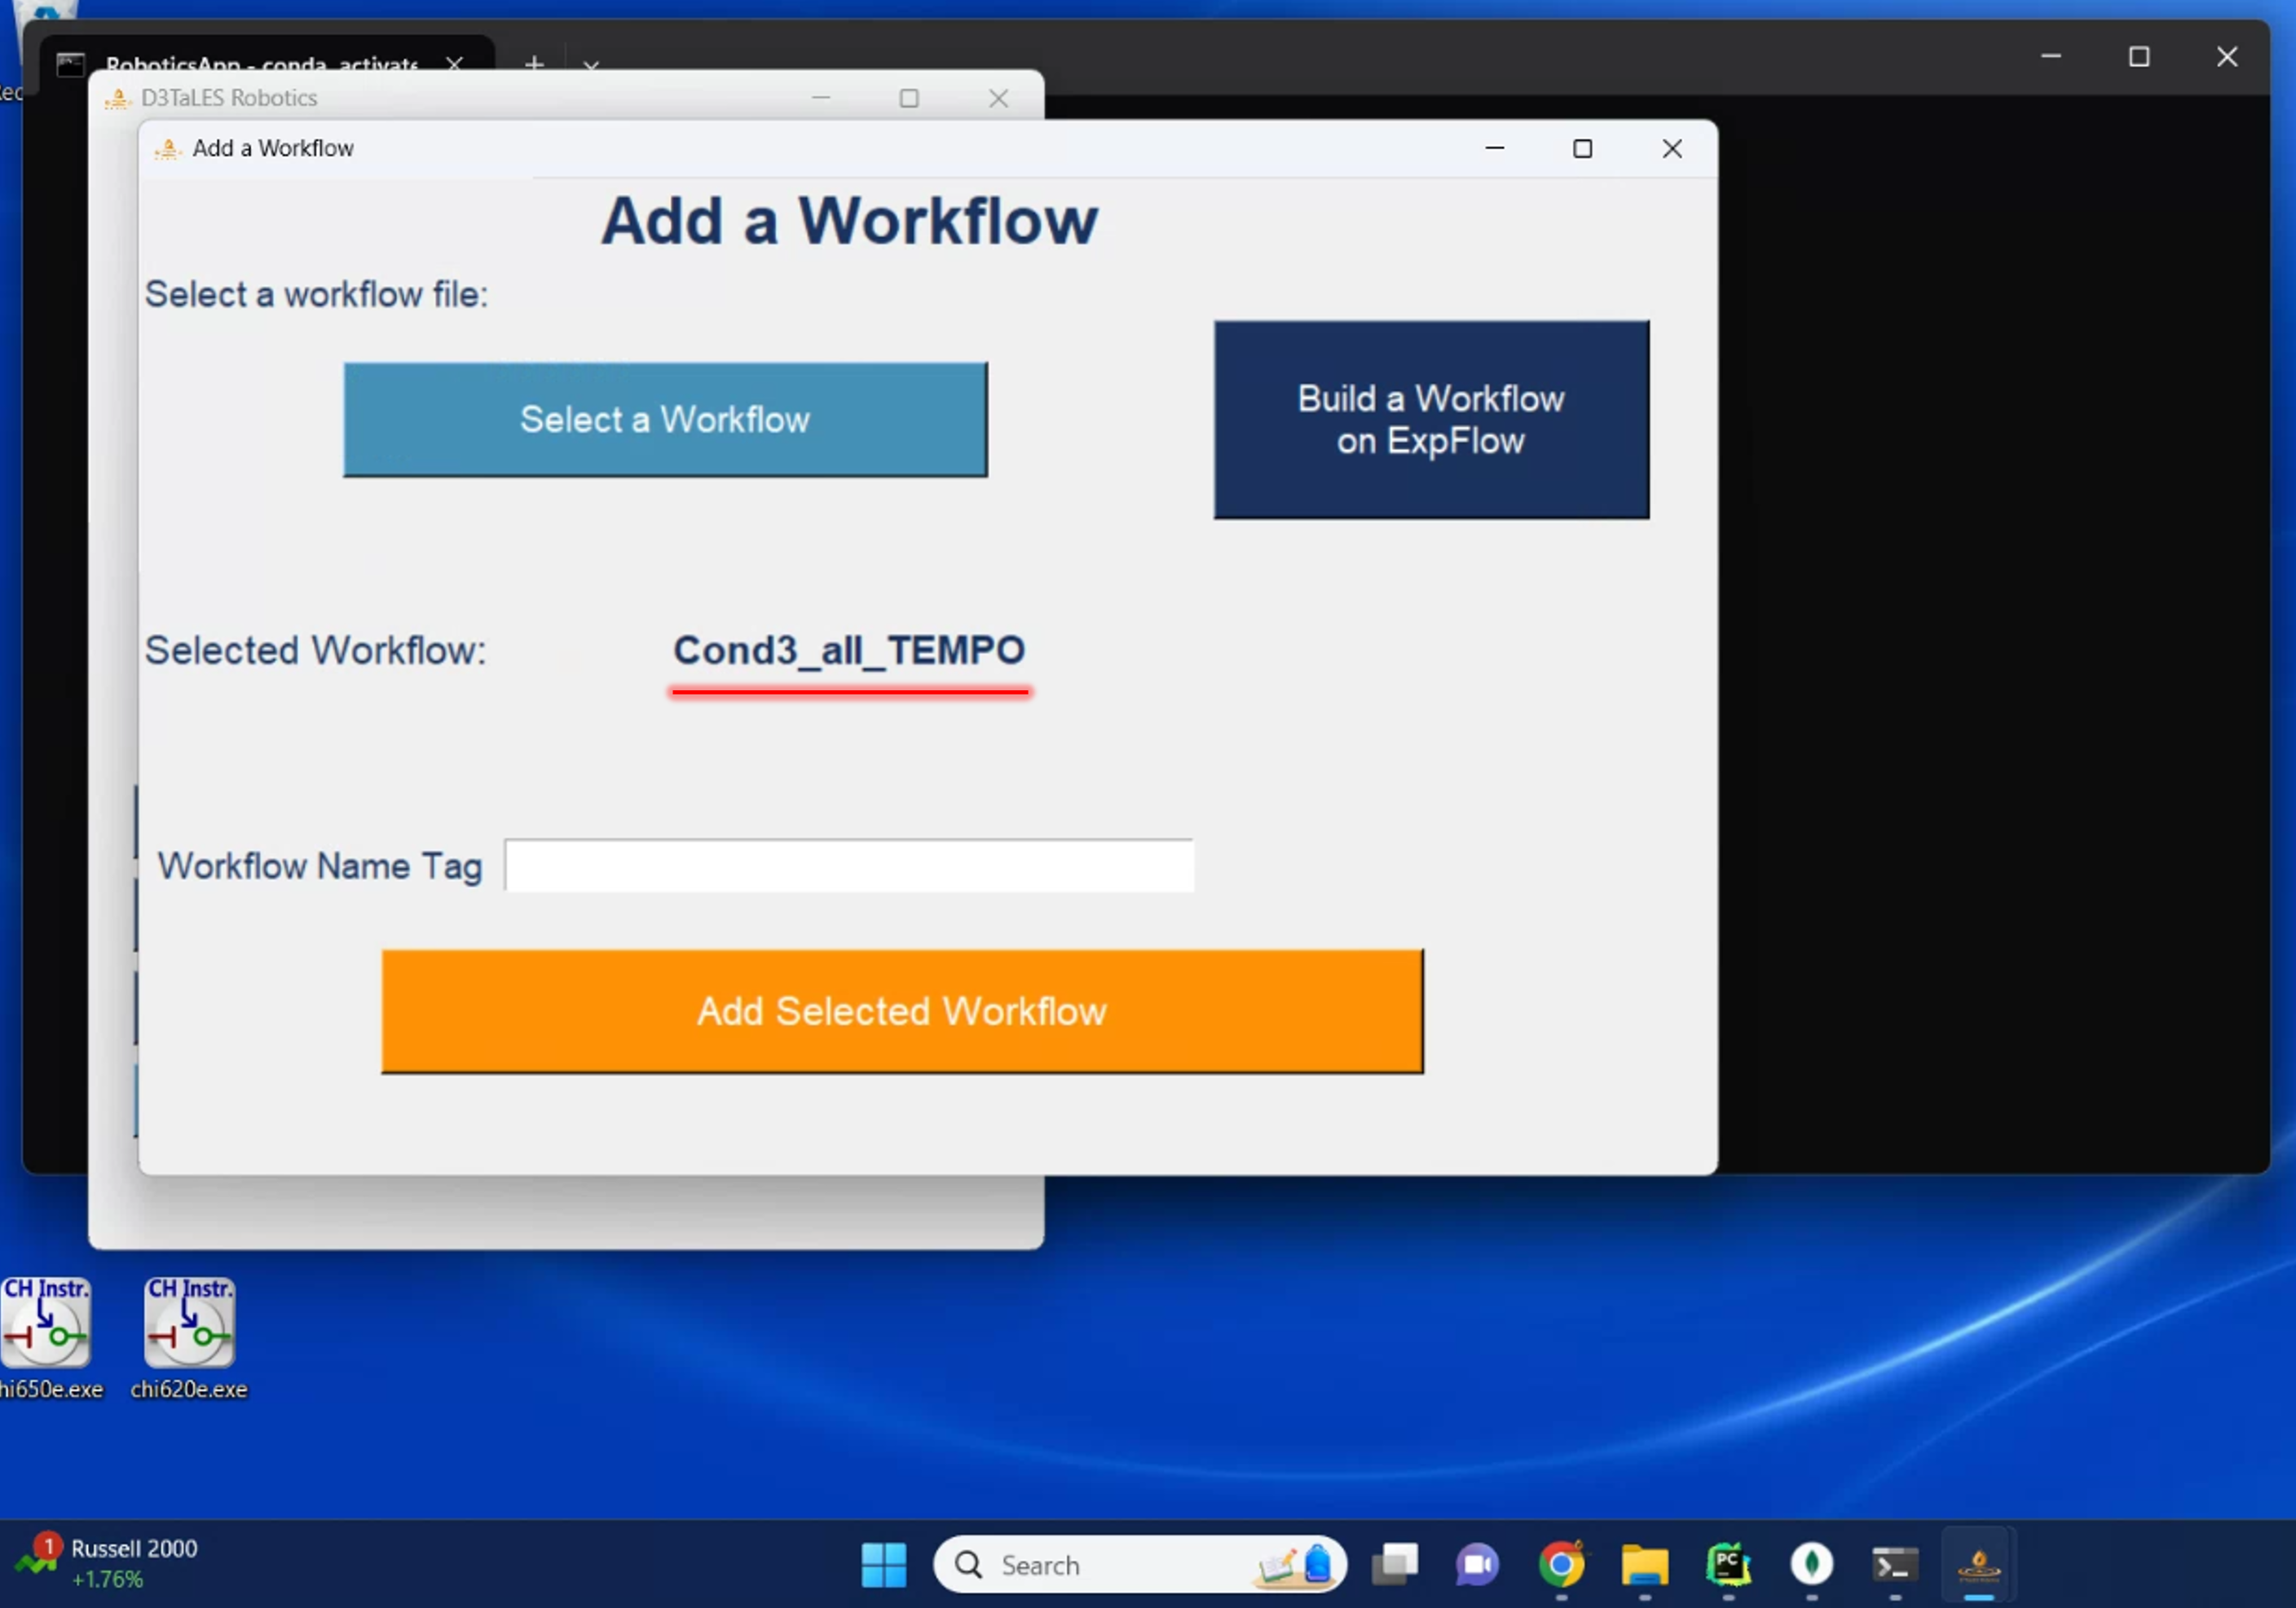
First, open the Robotics App and select Add Workflow. In the resulting popup window, use Select a Workflow to select the downloaded JSON Robotics Workflow file. Once you see the file’s name on the popup window (red line below), select Add Selected Workflow.
Another popup window titled Set Locations should appear. Use the dropdown menues to (1) select the starting positions for each reagent and (2) select the vial home positions for each experiment.
The reagent starting positions denote where each reagent is. For example, if liquid dispensing station 2 contains acetonitrile, Acetonitrile should be given the starting location solvent_02. The location experiment_vial indicates that the reagent has already been manually measured into the appropriate experiment vial before the robotic experiments are run. It essentially tells the Robotics API to skip trying to dispense this reagent because it ‘magically’ already exists in the vial. (This is necessary only because solvent dispensing stations do not yet exist.)
The vial home position indicates which vial will contain each experiment. Recall that an ExpFlow Robotic Workflow consists of n parallel experiments (each one consisting of the protocol specified in the base ExpFlow Template). When running the robotic workflow, each experiment will occupy a single experiment vial, the vial specified here.
After setting the reagent and vial positions, select Set Locations and Add Workflow. This will trigger the conversion of your workflow to a FireWorks-based robotic workflow!

Monitoring workflows with FireWorks WebGUI
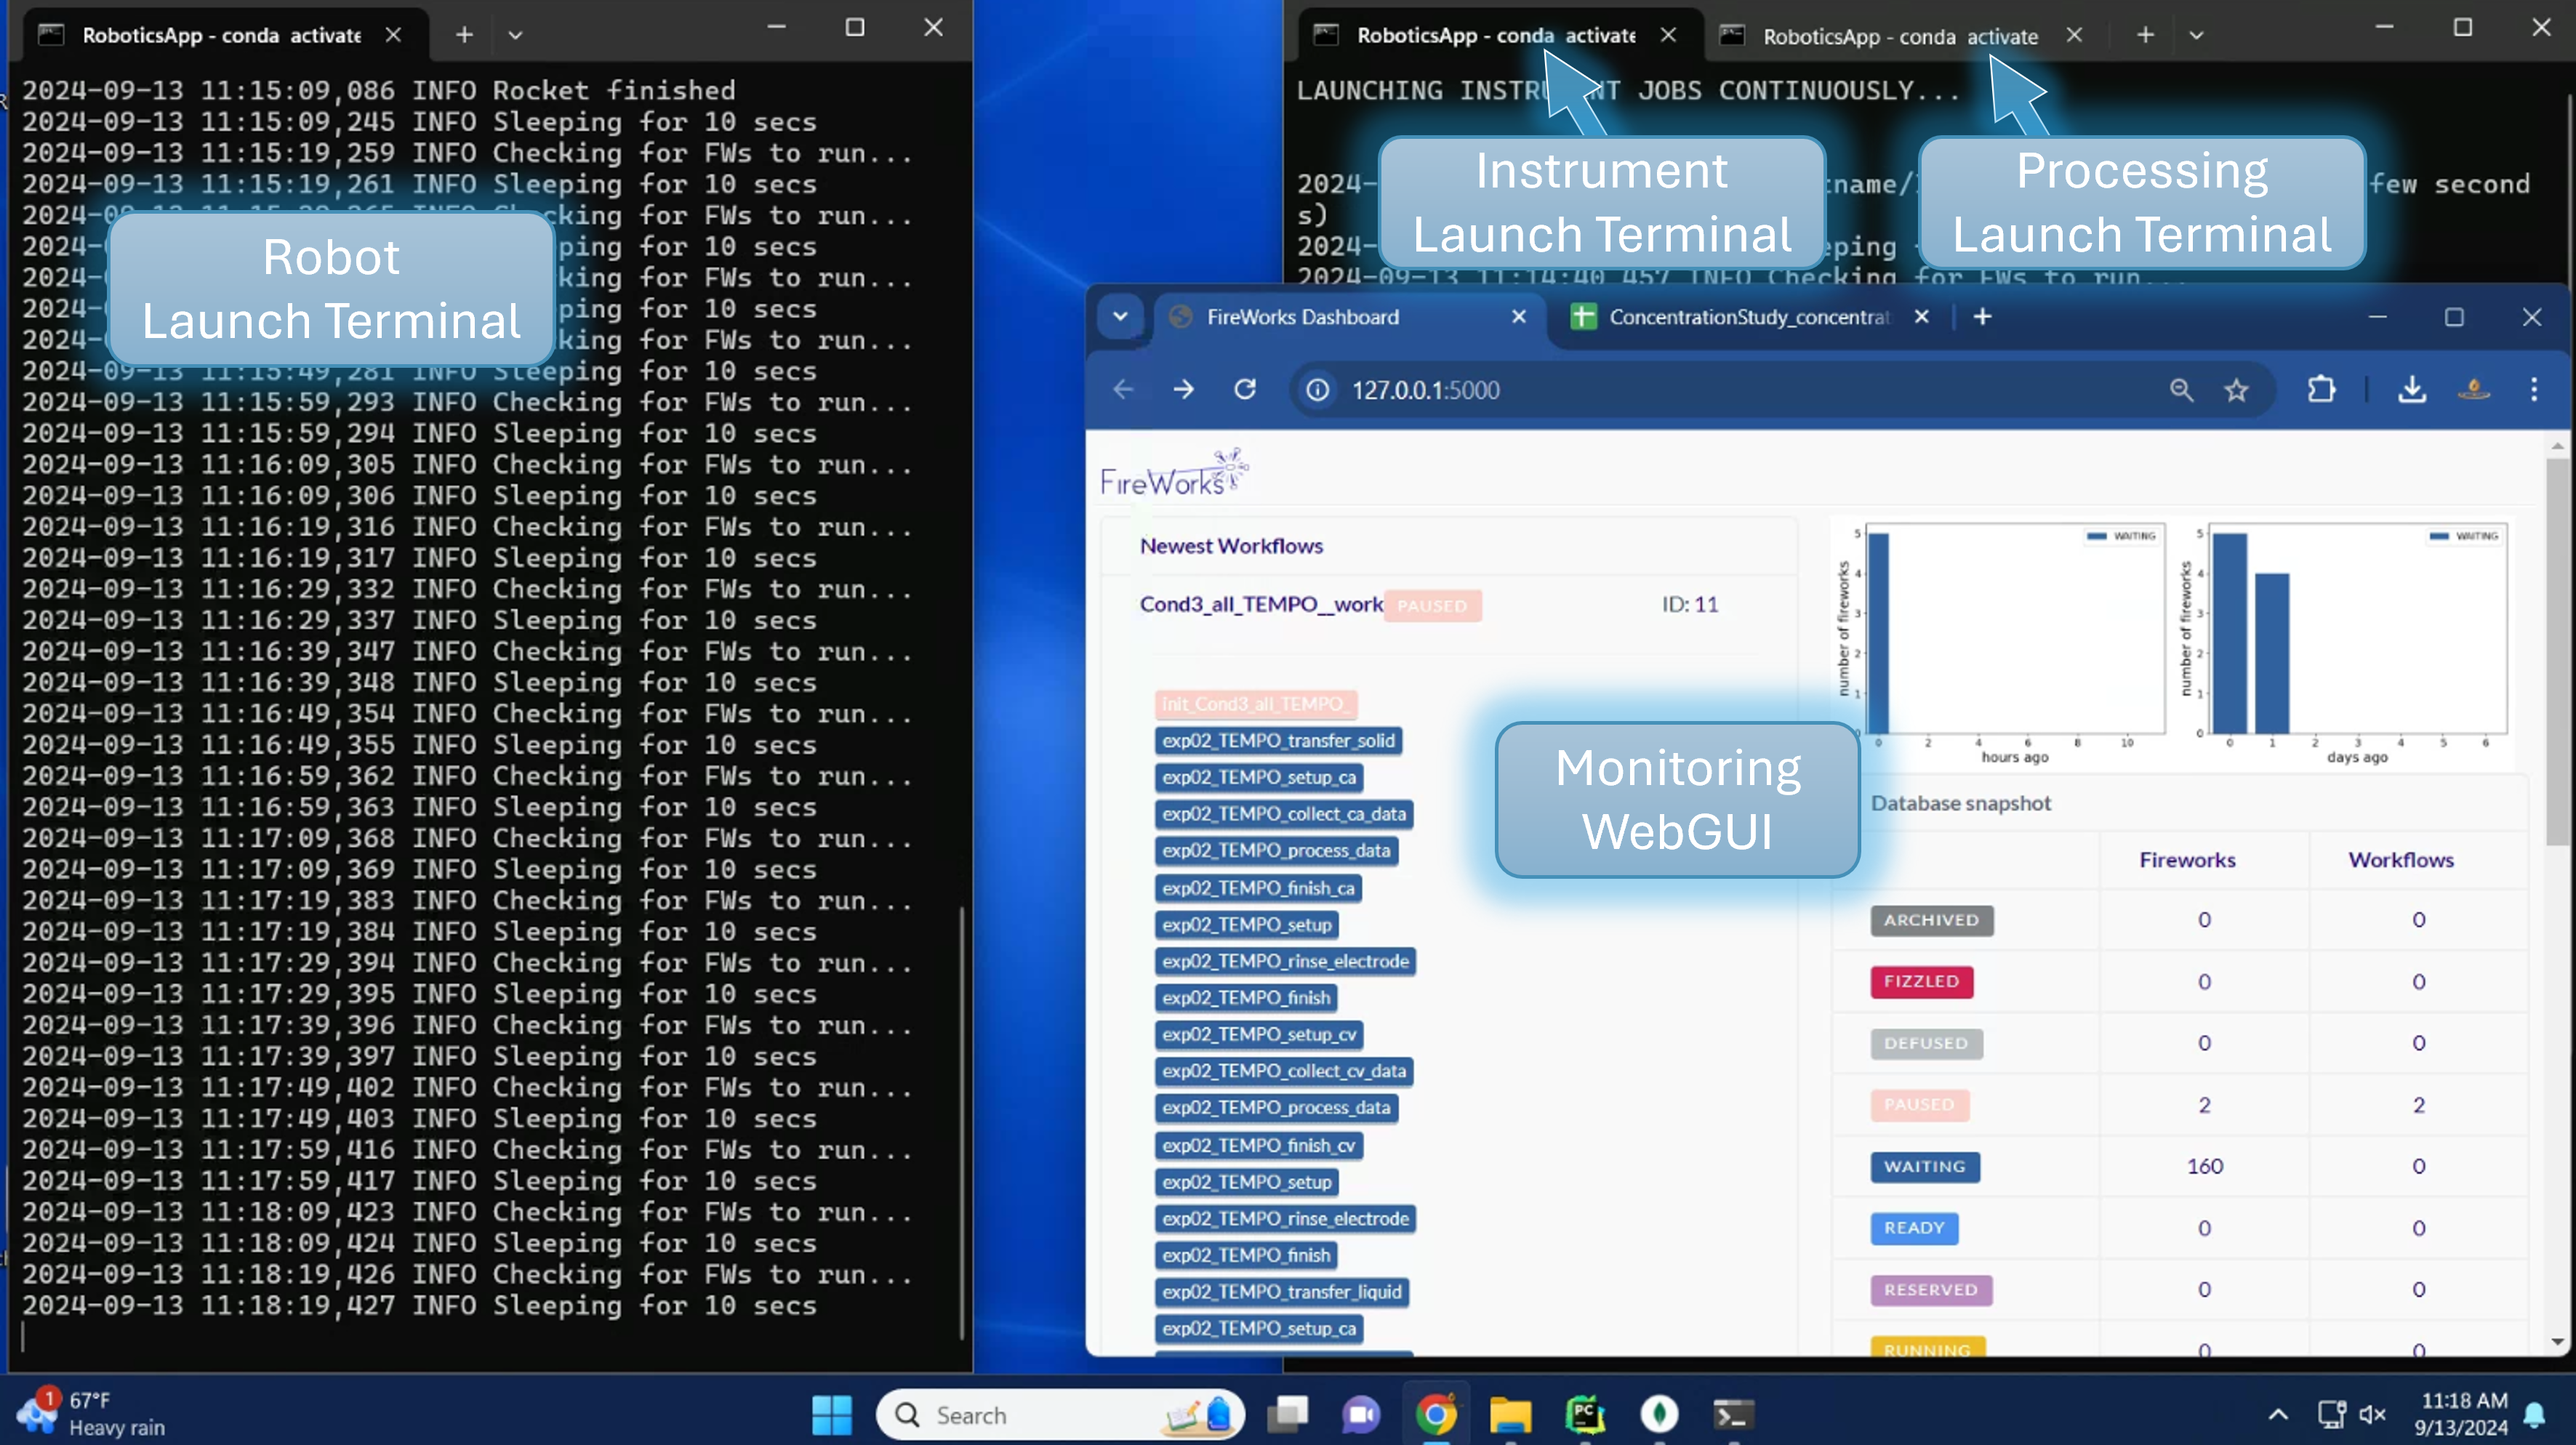
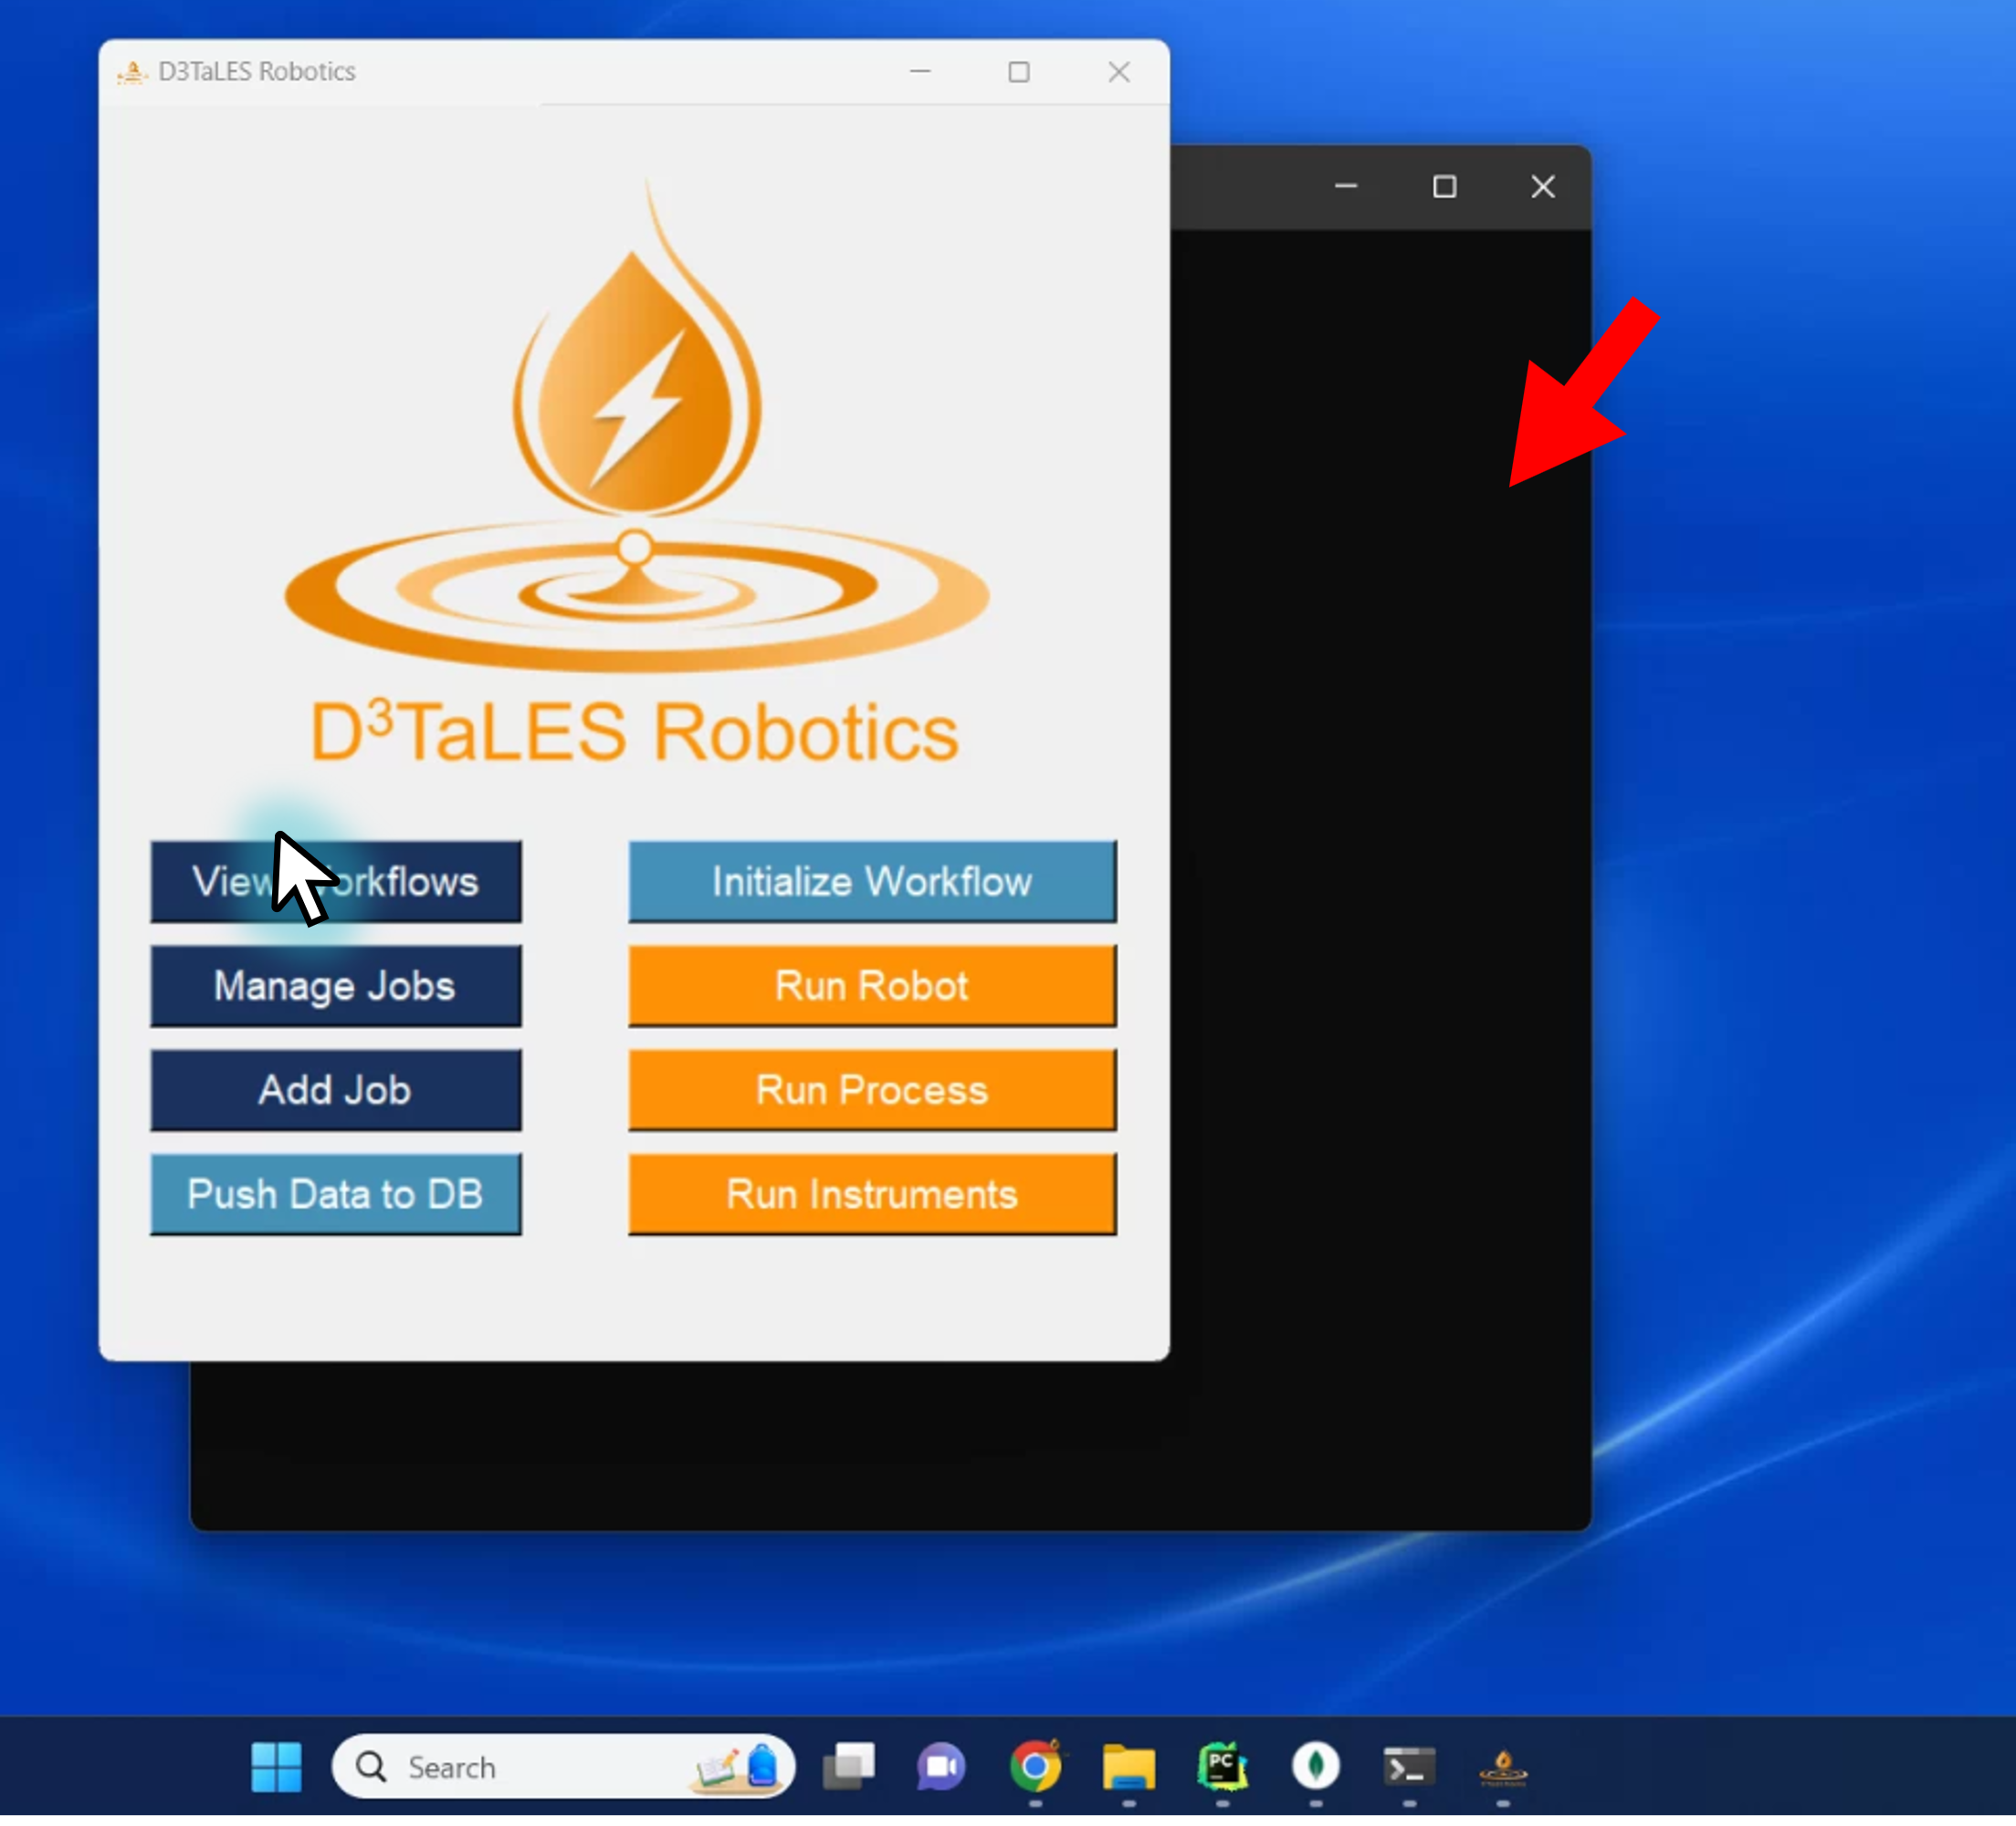
Once loaded, a robotics workflow can be easily monitored via the FireWorks WebGUI. This can be launched through the command line with lpad webguior via the Robotics App by selecting View Workflows (blue cursor in the image below). Importantly, the WebGUI will only work while the launch terminal is running. This means that, if you launch the WebGUI from the Robotics App, you must leave the black launch terminal (red arrow in the image below) running. Feel free to minimize it while running experiments.
For more detailed explination of the FireWorks WebGUI, see the original FireWorks Docs.
Managing Jobs
One of the many benetits to using the FireWorks job management system is the ease at which jobs can be Canceled (paused or defused), restarted, and deleted. This can be done through the command line with lpad <command> commands or via the Robotics App by selecting Manage Jobs. For more on the terminology for (relevant for job management via both the Robotics App and the command line), see the original FireWorks docs.
Launching Jobs!
Robotic workflows are run by launching the Fireworks jobs. Jobs can be launched through the command line (FireWorks rlaunch commands ) or via the Robotics App (recommended) by selecting one of the Run ___ buttons. As noted in elsewhere (Fireworks), Fireworks are given a category, and when launching Firework jobs through the Robotic App, only Fireworks with a specific category are launched. Selecting Run Robot launches robotic arm Fireworks; selecting Run Instrument launches Fireworks executing instrument elevators and measurements. Selecting Run Processing launches only processing Fireworks. Finally, selecting Initialize Workflow launches a workflow initialization Firework. Launch only one initialize job at a time!
In paractice, It is recommended to use the Robotics App Run__ buttons to open one terminal for each of the categories Robot, Instrument, and Processing continuously launching jobs. Then, when you are ready to start the workflow, launch the initialize workflow Firework.